Community News
Legendary Level Guide
Below you will find each objective required to complete the Legendary Tier of the Dark vs. Light event. Notice the “spoiler” button associated with each objective. If you would like more information on how to complete that objective, simply click that objectives spoiler button for more details.
To participate in the Dark vs. Light event, you must use a character created on or after June 28, 2016. You will know if your character is participating in the event if they have the following icon present on the Character Select screen.
![]()
Legend Tier Objectives:
Gree Slayer
Once there, look for and kill any Droid enemy NPCs that you find.
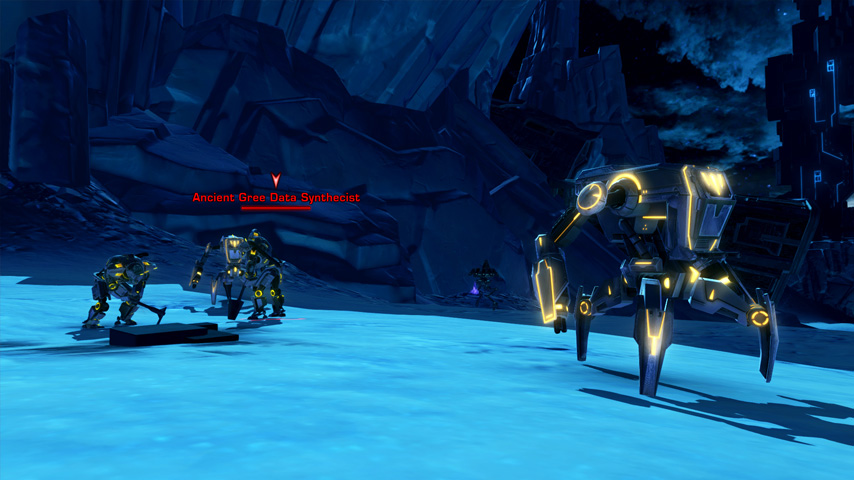
Once your Character has killed 50 Gree droids, you will receive the Achievement “Dark vs. Light: Gree Slayer” to note that you have completed this objective.
Living Plague
Doing so will grant you the Mission “Combating the Plague” if you are Imperial, or “To Fight Infection” if you are Republic. Follow the Mission steps and they will eventually lead you to the Rakghoul Tunnels located on Alderaan, Tatooine, or Corellia. Once you are inside the tunnels, any Rakghouls that you kill will count towards this objective.
Once your Character has killed 50 Rakghouls, you will receive the Achievement “Dark vs. Light: Living Plague” to note that you have completed this objective.
Plaguebearer
With the plague contracted, you will continually get more and more sick until finally your character will explode. This explosion will kill your character and spread the plague to anyone in the immediate area who does not have the plague.
Once your Character has spread the Rakghoul plague to five other players, you will receive the Achievement “Dark vs. Light: Plaguebearer” to note that you have completed this objective.
Dreaded News
Once your Character has defeated 50 non-player opponents, you will receive the Achievement “Dark vs. Light: Dreaded News” to note that you have completed this objective.
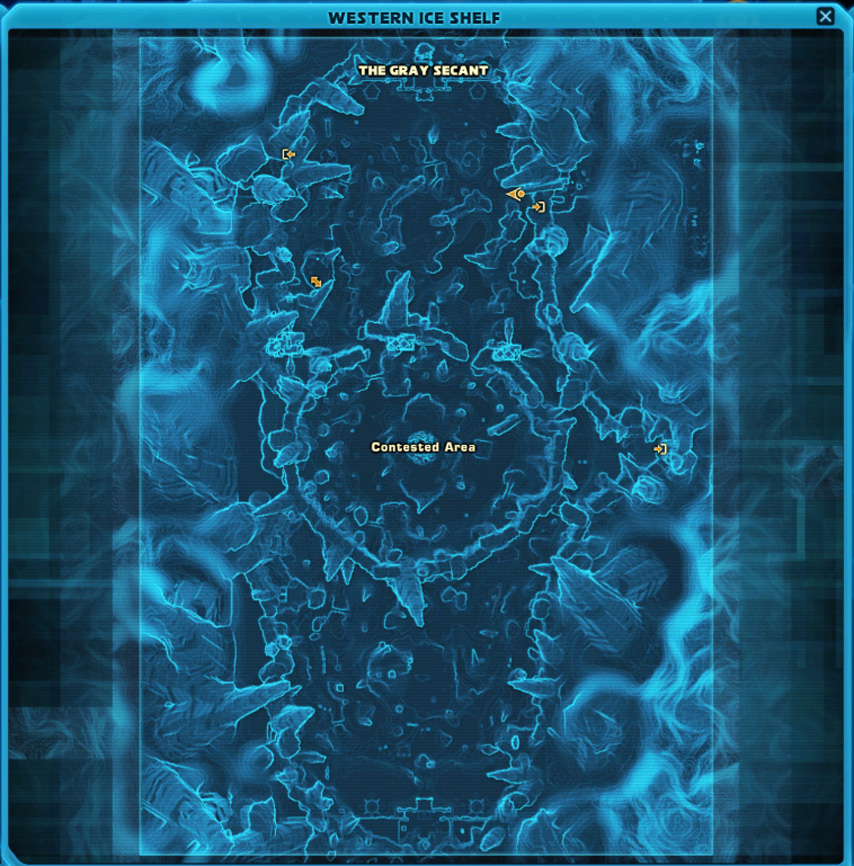
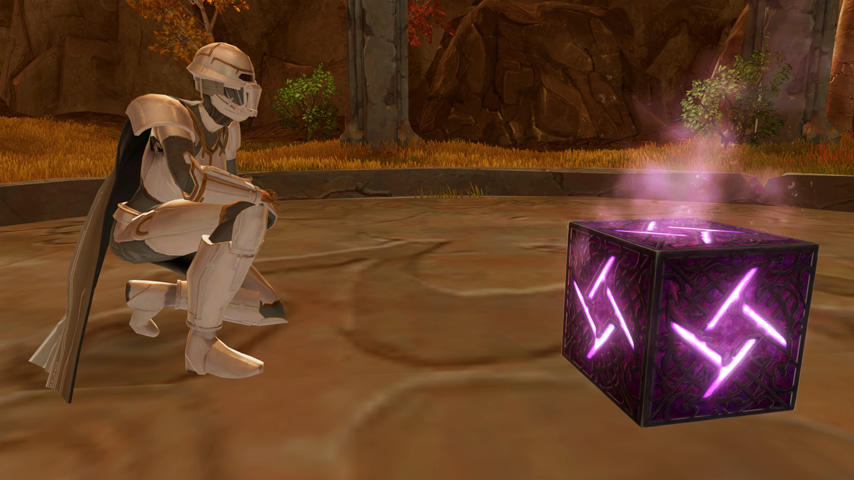
Giant Killer
- The Rogue Cartel Warbot found on Quesh
- Snowblind on Hoth
- The Primal Destroyer on Belsavis
- Ulgo Siegebreaker on Alderaan
- The Worldbreaker Monolith on Ziost
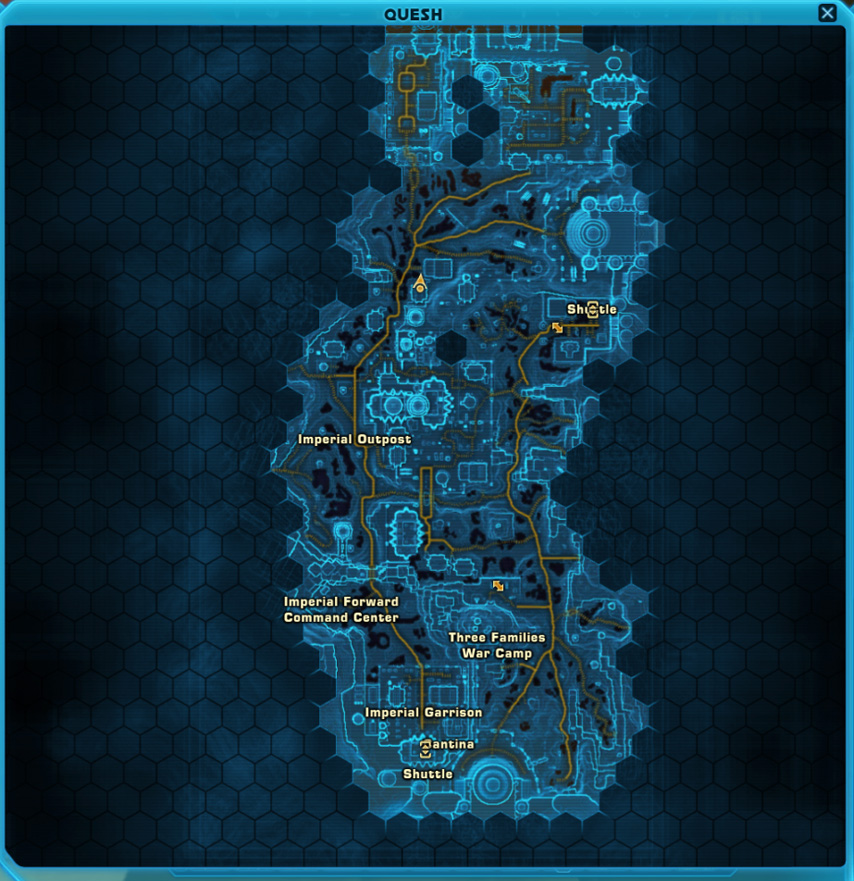
Each of these enemies are hidden somewhere on their respective planet, so it may take some time for you and your group to track them down. As an example, you can find the Rogue Cartel Warbot on Quesh inside of Gonk’s Infinite Loop. You can see its location on the map below:
Once your Character has found and defeated all five world bosses, you will receive the Achievement “Dark vs. Light: Giant Killer” to note that you have completed this objective.
Dragonslayer
The bosses that you need to defeat and their locations are as follows:
- Karagga the Unyielding in Karagga’s Palace
- Operator IX in Terror From Beyond
- Sparky in Ravagers
- Gate Commander Draxus in Dread Fortress
- Titan 6 in Scum and Villainy
Once your Character has defeated these five bosses, you will receive the Achievement “Dark vs. Light: Dragonslayer” to note that you have completed this objective.
Eternal Champion
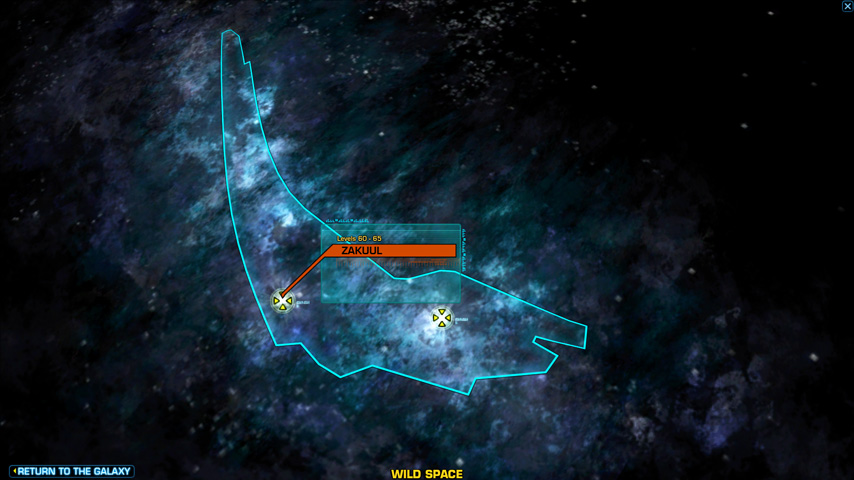
To access the Eternal Championship, you will want to head to the Platform 6 Cantina on Zakuul. You will want to start by traveling to Zakuul via your player ship.
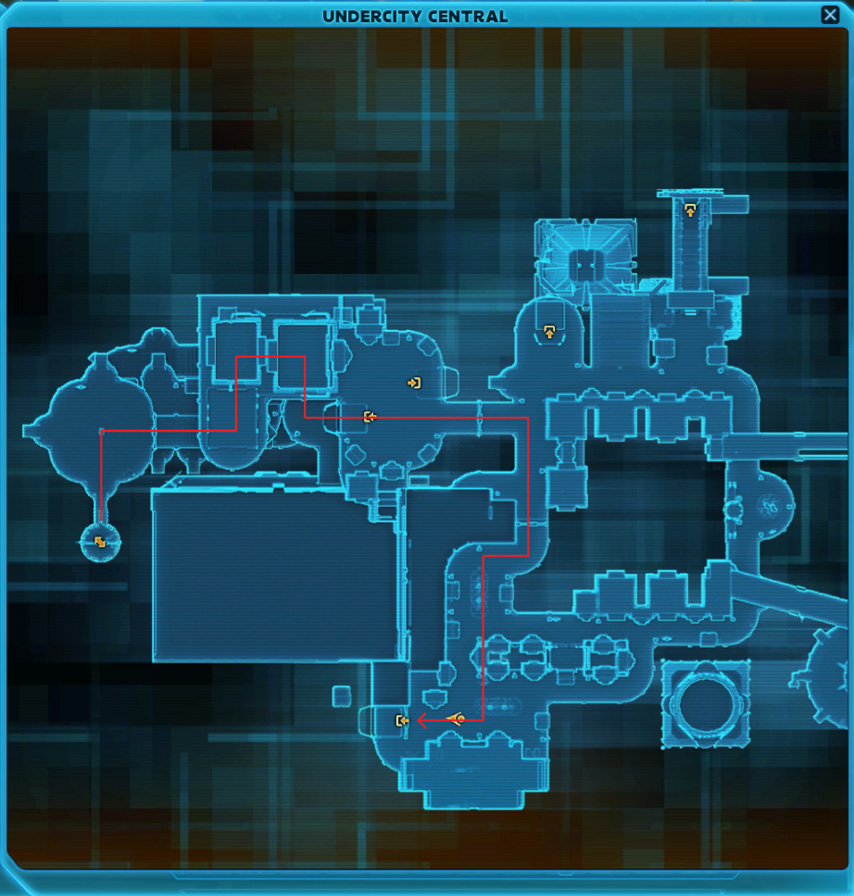
When you land on Zakuul, you will be located in the Undercity Central. You will need to head from there, into the Undercity Plaza. Please follow the map below to get there (you can view your own map by pressing ‘M’, by default)
Once you are in the Undercity Plaza, head straight to the Platform 6 Cantina. Follow the map below for directions.
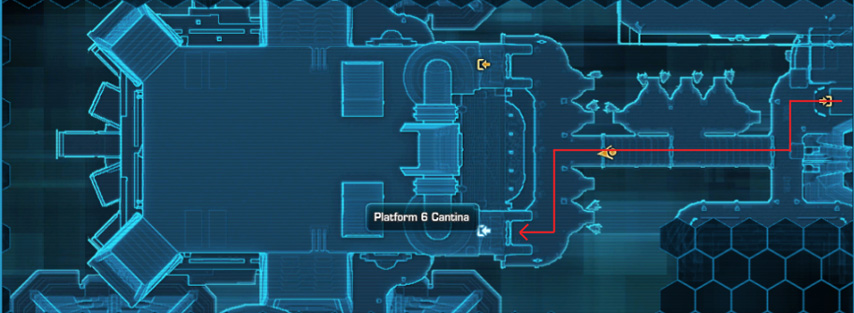
When you have entered the Platform 6 Cantina, seek out Dominaire. Speak with him and he will grant you the “Enter the Mysterious Stranger” Mission.
That Mission will send you to the Arena Grand Events Mission terminal just a short distance away.
Use that Terminal to pick up the [Solo] The Eternal Championship Mission. Simply follow the markers for that Mission to begin the Eternal Championship. After completing a round in the Eternal Championship, you will have the option to continue on in the competition or to exit. You will need to continue defeating opponents until you reach round ten, the final round, where you will face off against Zotar. Once you defeat Zotar you will receive the Achievement “Dark vs. Light: Eternal Champion” to note that you have completed this objective.
Flashpoint Master
- Assault on Tython (both the Empire and Republic version)
- Athiss
- Battle of Ilum
- Battle of Rishi
- Blood Hunt
- Boarding Party
- Cademimu
- Czerka Core Meltdown
- Czerka Corporate Labs
- Depths of Manaan
- Directive 7
- Hammer Station
- Kaon Under Siege
- Korriban Incursion (both the Empire and Republic version)
- Legacy of the Rakata
- Lost Island
- Maelstrom Prison
- Mandalorian Raiders
- Taral V
- The Black Talon
- The Esseles
- The False Emperor
- The Foundry
- The Red Reaper
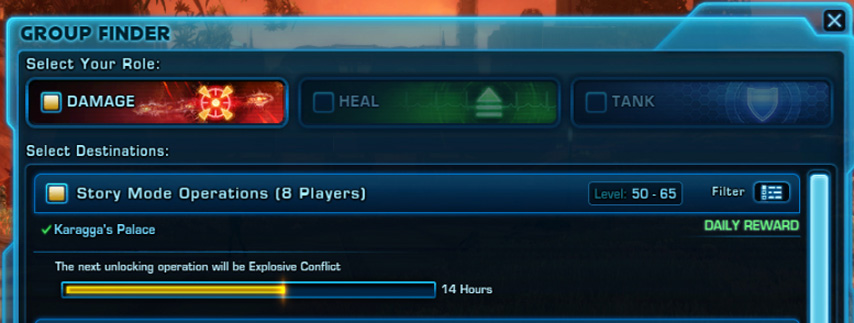
Hard Mode Flashpoints are action-packed adventures made to be played by characters with a group of other players. First, start by clicking on the Group Finder icon located at the top left of your mini-map. This will bring up the Group Finder interface.

With the Group Finder interface up, you are only a few clicks away from the action! At the top of the interface, select your preferred playstyle between Damage, Healing, and Tanking (note: you can select more than one option).

Now, for this objective you will need to play through the Hard Mode versions of the Flashpoints. Hard Mode Flashpoints are meant to be a challenge for a group of four players. Keep in mind that you have to complete each Flashpoint listed above to complete the “Flashpoint Master” objective, refer earlier in this section for which Flashpoints you need. To queue for a specific Hard Mode Flashpoint follow these steps:
First, go to the Story Mode Operations and Tactical Flashpoints sections and make sure that they are not checked.
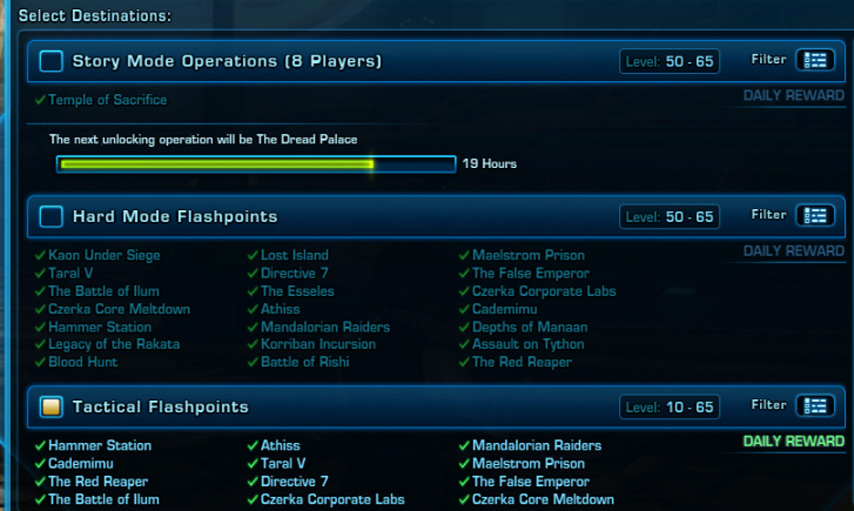
Once that is completed, scroll down to the Hard Mode Flashpoints section. Once there, click on the selection filter button in the top right of that section. On that pop-up you can select only the Flashpoints that you still need to complete.
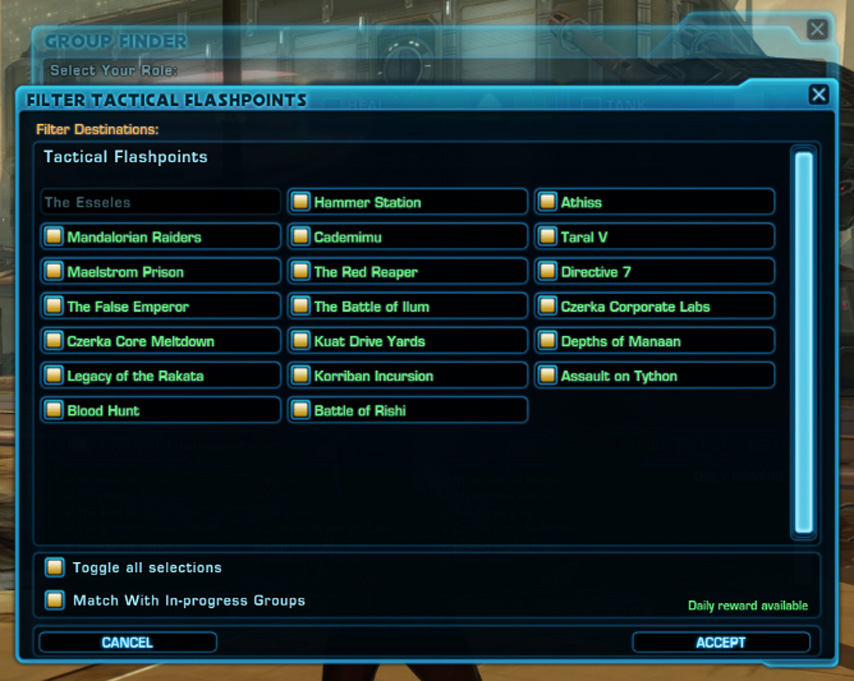
With your Flashpoints selected, press the Join Queue button. Once your group is ready you will receive a pop-up indicating that you can join the Flashpoint. Press Join Group to hop in! Repeat these steps and complete each Flashpoint in the “Flashpoint Master” objective to complete it.
Ace Starfighter

From the Starfighter interface you can change ships, change ship components, cosmetics, and most importantly you can queue for a match. To jump into a match simply click the Battle button located in the bottom right of the Starfighter interface.
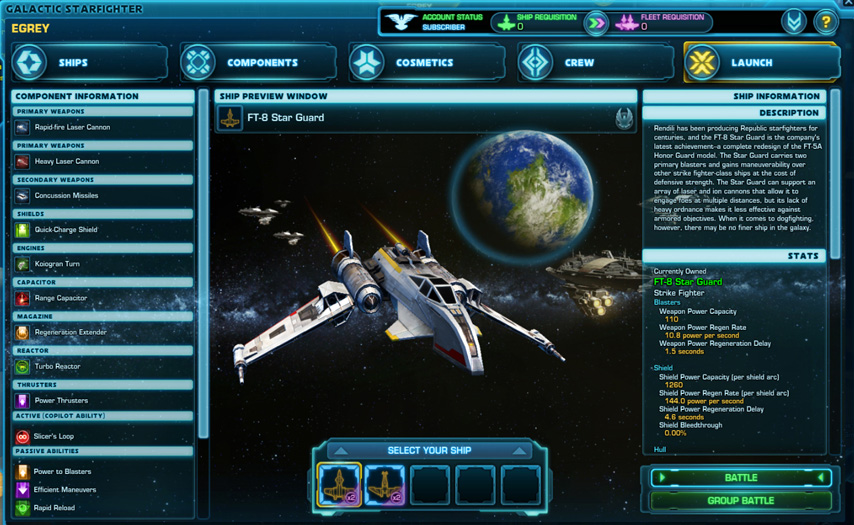
After a time, you will see a pop-up indicating that your match is ready.
Once your Character has completed five Galactic Starfighter matches, you will receive the Achievement “Dark vs. Light: Ace Starfighter” to note that you have completed this objective.
Warzone Veteran
In the far bottom right your mini-map area, you will see and icon which is in the shape of your faction’s logo. Right-click on that icon and then left-click on “Queue Solo.”
Once you have entered the Warzone Queue, your icon will begin flashing. It may take some time for a Warzone match to populate, but once your match is ready you will see the following pop-up:

Simply click enter now to be placed in a Warzone! Play five of these matches through to completion and once that is done, you will receive the Achievement “Dark vs. Light: Warzone Veteran” to note that you have completed this objective.
Manhunter
After a short cinematic, you will be directed to the Cartel Bazaar section of the fleet. There you will find a Mission terminal which grant Bounty Contract Missions tied to the event.

Simply pick up one of the available Bounty Missions and follow the Mission directions to complete a Bounty Contract. Note that only one Bounty Contract can be completed each day. Once your Character has completed three Bounty Contracts, you will receive the Achievement “Dark vs. Light: Manhunter” to note that you have completed this objective.
Ziost
Continue through that main story Mission on Ziost. Once your Character has completed the Mission “For Ziost,” you will receive the Achievement “Dark vs. Light: Ziost” to note that you have completed this objective.
Alliance Hero
You must have one level 50 of each of the following eight Classes:
- Jedi Knight
- Jedi Consular
- Smuggler
- Trooper
- Sith Warrior
- Sith Inquisitor
- Imperial Agent
- Bounty Hunter
Once all eight Classes among your Characters have reached level 50, you will receive the Achievement “Dark vs. Light: Alliance Hero” to note that you have completed this objective.
Crafting Virtuoso
- Armormech
- Armstech
- Artifice
- Biochem
- Cybertech
- Synthweaving
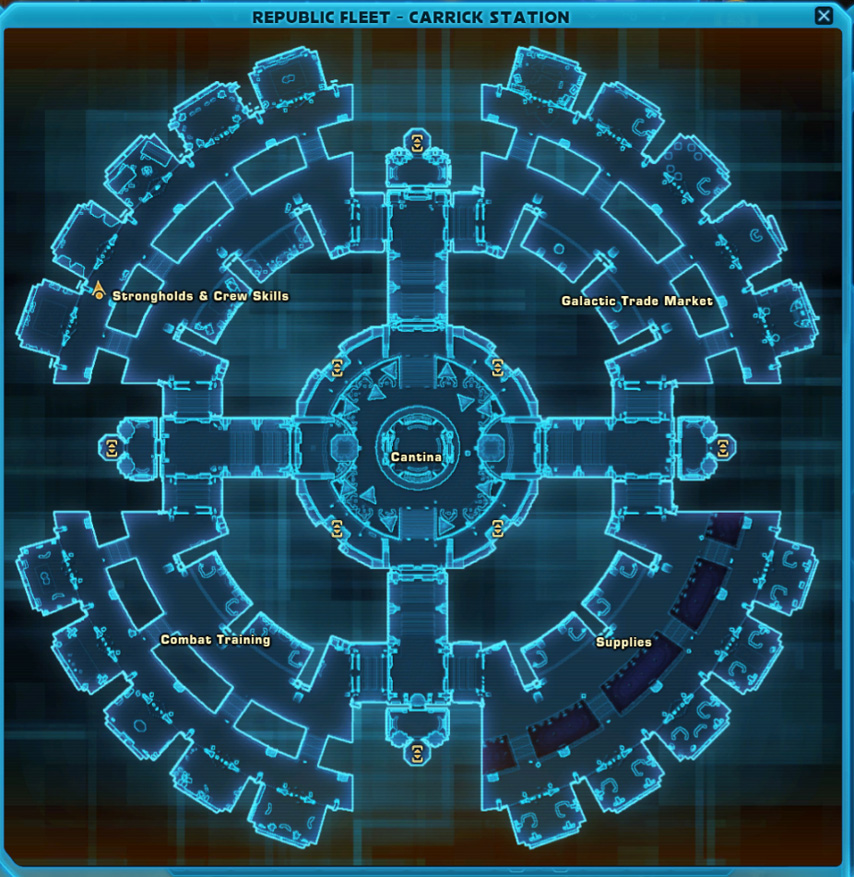
In order to pick up a Crew Skill, you will want to seek out that specific Crew Skills trainer located in the Strongholds & Crew Skills section of your respective fleet.
Once there, simply talk to the Crew Skill trainer and you will learn that skill. Note that you can only have one Crafting Crew Skill per character.
In order to level up a Crafting Crew Skill, you will need to craft individual items. To do so, open the Crew Skills user interface by press B (by default) or clicking on the Crew Skills icon, located at the top of your screen.
This will bring up a list of all of your currently trained Crew Skills, your skill level, and any available Companions. Located next to the Companions you will see an icon which indicates your available Crew Skills, click that icon.
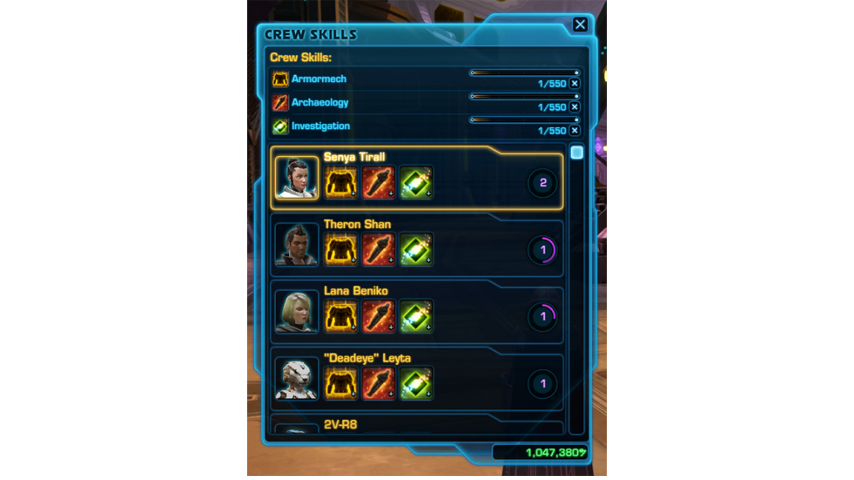
This will bring up the Crafting:
Once you have your Gathering Crew Skill, you can gain materials by either sending your Companions on Gathering Missions, or by harvesting from gathering nodes out in the galaxy.
Now that you have the item you want to craft, and the materials required to make it, simply hit the “Craft” button in the bottom right corner and your chosen Companion will begin crafting. Crafting an item takes time, from a few seconds to several minutes. Once the item is done being crafted you will receive a message on your screen, and the item will be placed in your inventory.

As your Crafting Skill increases, be sure to visit your Trainer to learn new schematics!
Once you have reached skill level 550 with all six Crafting Crew Skills, you will receive the Achievement “Dark vs. Light: Crafting Virtuoso” to note that you have completed this objective.
Merciless
As you make these choices, you will accumulate points. As these points increase you will achieve new levels of Dark or Light side alignment. You can check how many points you have earned for each side on your character sheet (C by default) and looking on the left of your character.

Once your Character has made enough Dark side decisions to reach Dark V alignment, you will receive the Achievement “Dark vs. Light: Merciless” to note that you have completed this objective.
Righteous
As you make these choices, you will accumulate points. As these points increase you will achieve new levels of Dark or Light side alignment. You can check how many points you have earned for each side on your character sheet (C by default) and looking on the left of your character.
Once your Character has made enough Dark side decisions to reach Light V alignment, you will receive the Achievement “Dark vs. Light: Righteous” to note that you have completed this objective.
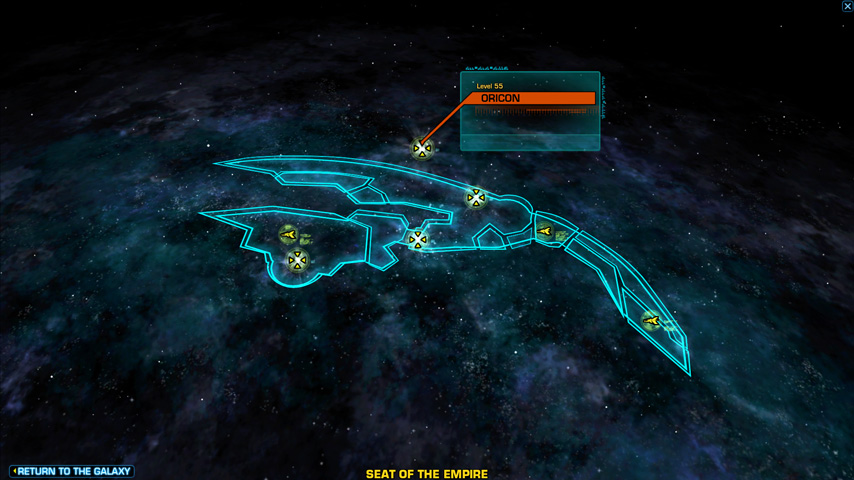
The Collector
Your character must discover and interact with all five of the new datacrons, they are located on the following planets:
- Ilum
- Makeb
- Nar Shadaa
- Oricon
- Voss
Once your Character has discovered all five datacrons, you will receive the Achievement “Dark vs. Light: The Collector” to note that you have completed this objective.
Big Earner
Once your Character has earned 1,000,000 credits, you will receive the Achievement “Dark vs. Light: Big Earner” to note that you have completed this objective.
Big Spender
Start by using your player ship to travel to Odessen. Once you have reached Odessen, head into the Alliance Camps. From there you will want to move on to the Underworld Logistics section of your headquarters. There you will find Gwhirrye Nekor!
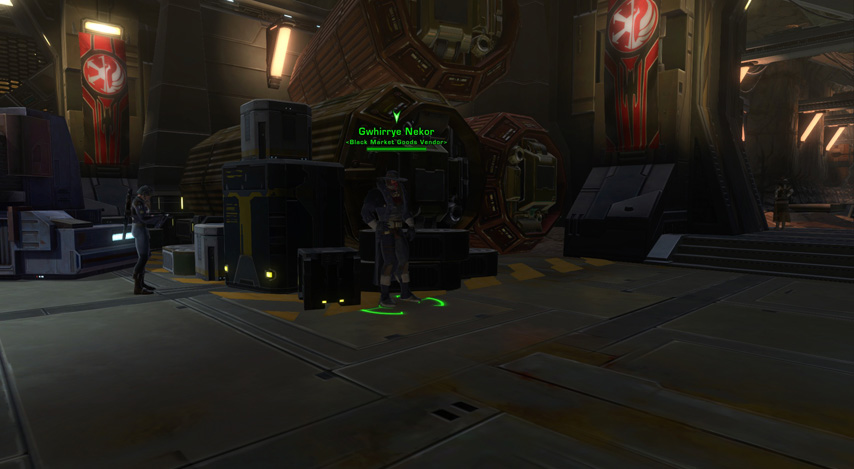
Once your Character has purchased the Datacron: Dark vs Light, you will receive the Achievement “Dark vs. Light: Big Spender” to note that you have completed this objective.
Ruthless Efficiency
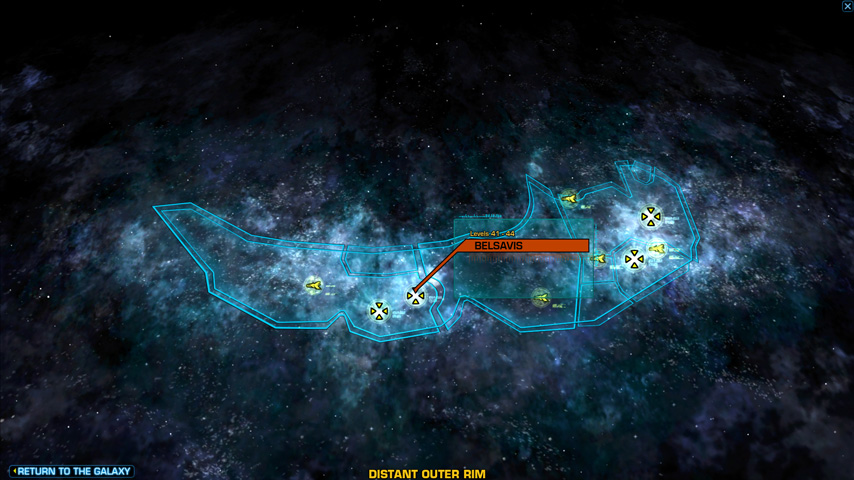
When your ship arrives on Belsavis, you will exit onto the Belsavis Orbital Station. From your ship hangar, head directly to the Belsavis Shuttle located on the other side of the Station. Activating the shuttle will offer you a few different travel options, you will want to select Daily: Section X.

When your shuttle has arrived in Section X, look immediately to the bottom of the ramp in front of you. There you will see a Droid, either G0-A1 for Imperial or B6-31 for Republic, with an available Mission. Speak with that droid to receive the Mission Fatal Errors for Imperial or The Fatality for Republic. Follow this Mission through to completion to unlock HK-51! Separately, if you have previously unlocked HK-51 on another character within your Legacy, you can use the Legacy Unlock feature for HK-51. Once you have HK-51 unlocked, set him to be your active Companion and kill any 50 NPCs in the Galaxy.
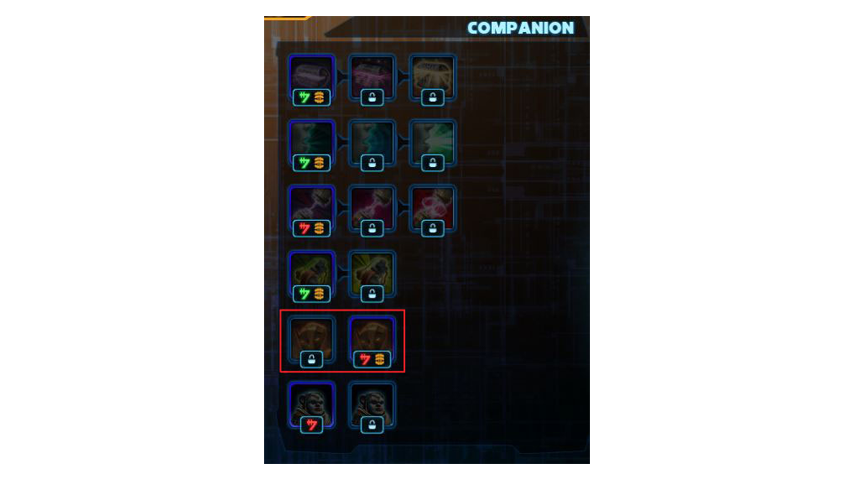
Once your Character has defeated 50 NPCs while HK-51 is active, you will receive the Achievement “Dark vs. Light: Ruthless Efficiency” to note that you have completed this objective.


You are about to leave this website...
This page is not meant to keep you from following the link you've clicked on. It is just a warning that you are about to leave this website. To go to this page, click the link below.
If you do not wish to follow this link, simply close this message.
The statements and opinions expressed on these websites are solely those of their respective authors and do not necessarily reflect the views, nor are they endorsed by Broadsword, LucasArts, and its licensors do not guarantee the accuracy of, and are in no way responsible for any content on these websites, and the Star Wars: The Old Republic privacy policy does not apply to their information collection practices.
Multimedia Player
Optional Cookies, including those that support the Multimedia Player, are currently disabled based on Your Privacy Choices settings.
Choose Accept and Play Video to enable the Multimedia Player, including its associated Cookies. This may involve the collection and sharing of your viewing information by YouTube for analytics and advertising purposes.
You can also choose to watch the video on YouTube.